When you need UI mockups to validate client expectations, you typically face two options: presenting abstract ideas and hoping they resonate, or starting a full design cycle that takes at least a week to produce a relevant concept.
Recently, we faced the same dilemma and decided to try an alternative approach. We used an LLM to design a user interface (UI) that could reflect our vision for the user experience. In the worst case, we’d lose a day. In the best case, we'd have mockups to present our idea to the client. Our experiment was a success. In just 8 working hours, we built 8 interconnected pages of a demo UI.
Were they production-ready or as visually refined as a designer’s mockups? Definitely not. But were they enough to give our client a clear understanding of the concept? Absolutely.
This article walks you through how to apply the same method in your projects to achieve fast and cost-efficient client validation.
In one of our projects, we developed a backend system for customer segmentation and message delivery. The system worked efficiently, integrating multiple data sources and messaging platforms, but we started looking for ways to enhance it further. One obvious improvement was to create a user interface for marketing campaign management.
We held several meetings with the client to discuss possible upgrades, but the conversations stalled because we didn’t have visuals to illustrate our ideas. We tried using simple schemas to outline the potential UI, yet they turned out too abstract, and the client asked us to come back with something more detailed.
We had a choice - wait for designer resources or experiment with LLM. And that's where our journey began.
The first step was to gather and structure the context of the task. Defining context for an LLM could easily deserve its own article. So here we’ll keep it short. In general, you can use prompt templates, AI-generated clarifying questions, and iterative refinement to help the model fully understand your intent.
In our case, we needed HTML pages as the output format for the demo UI. We explicitly included this requirement in our prompts. Without this clear direction, the LLM initially tried to generate images of the requested UI, which, as you might guess, is not exactly its strength. Providing a precise output format turned out to be essential.
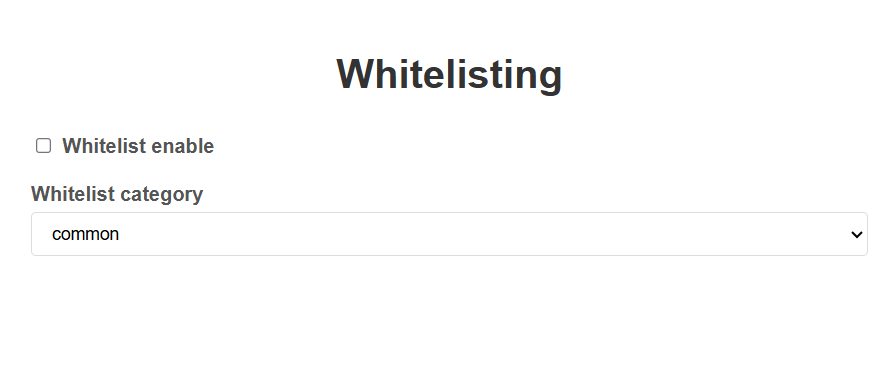
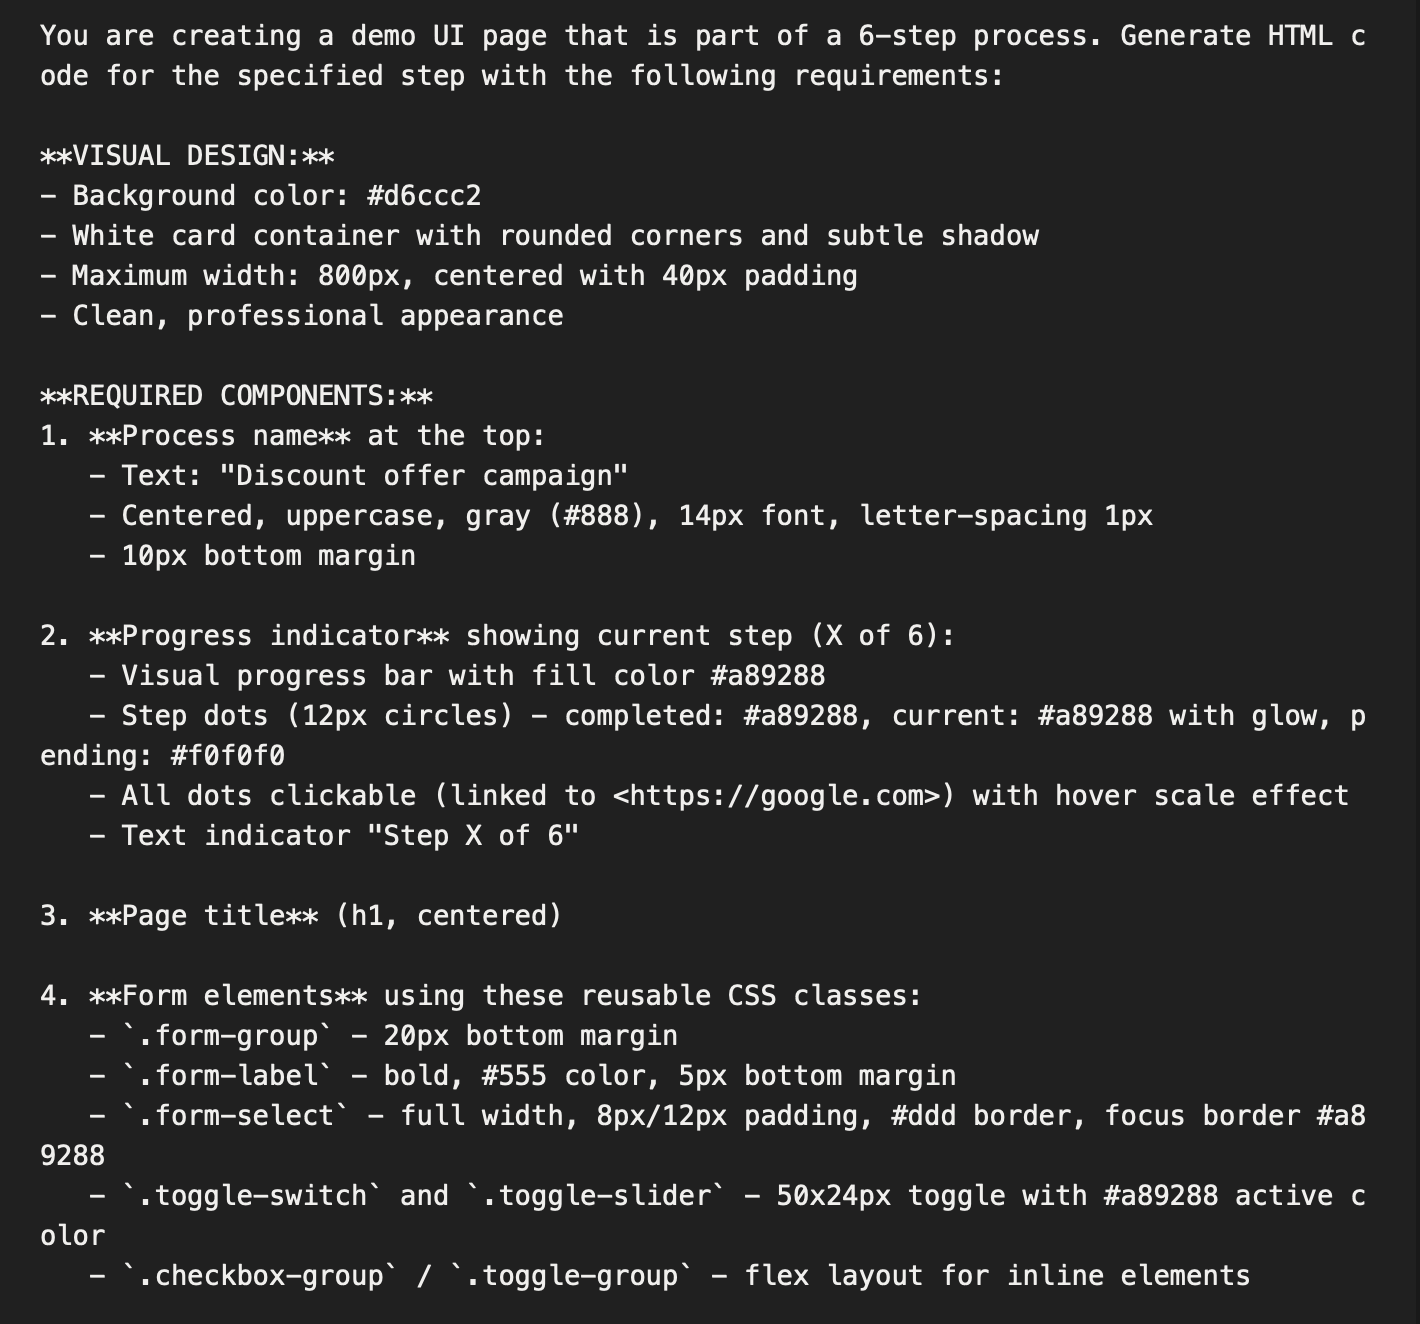
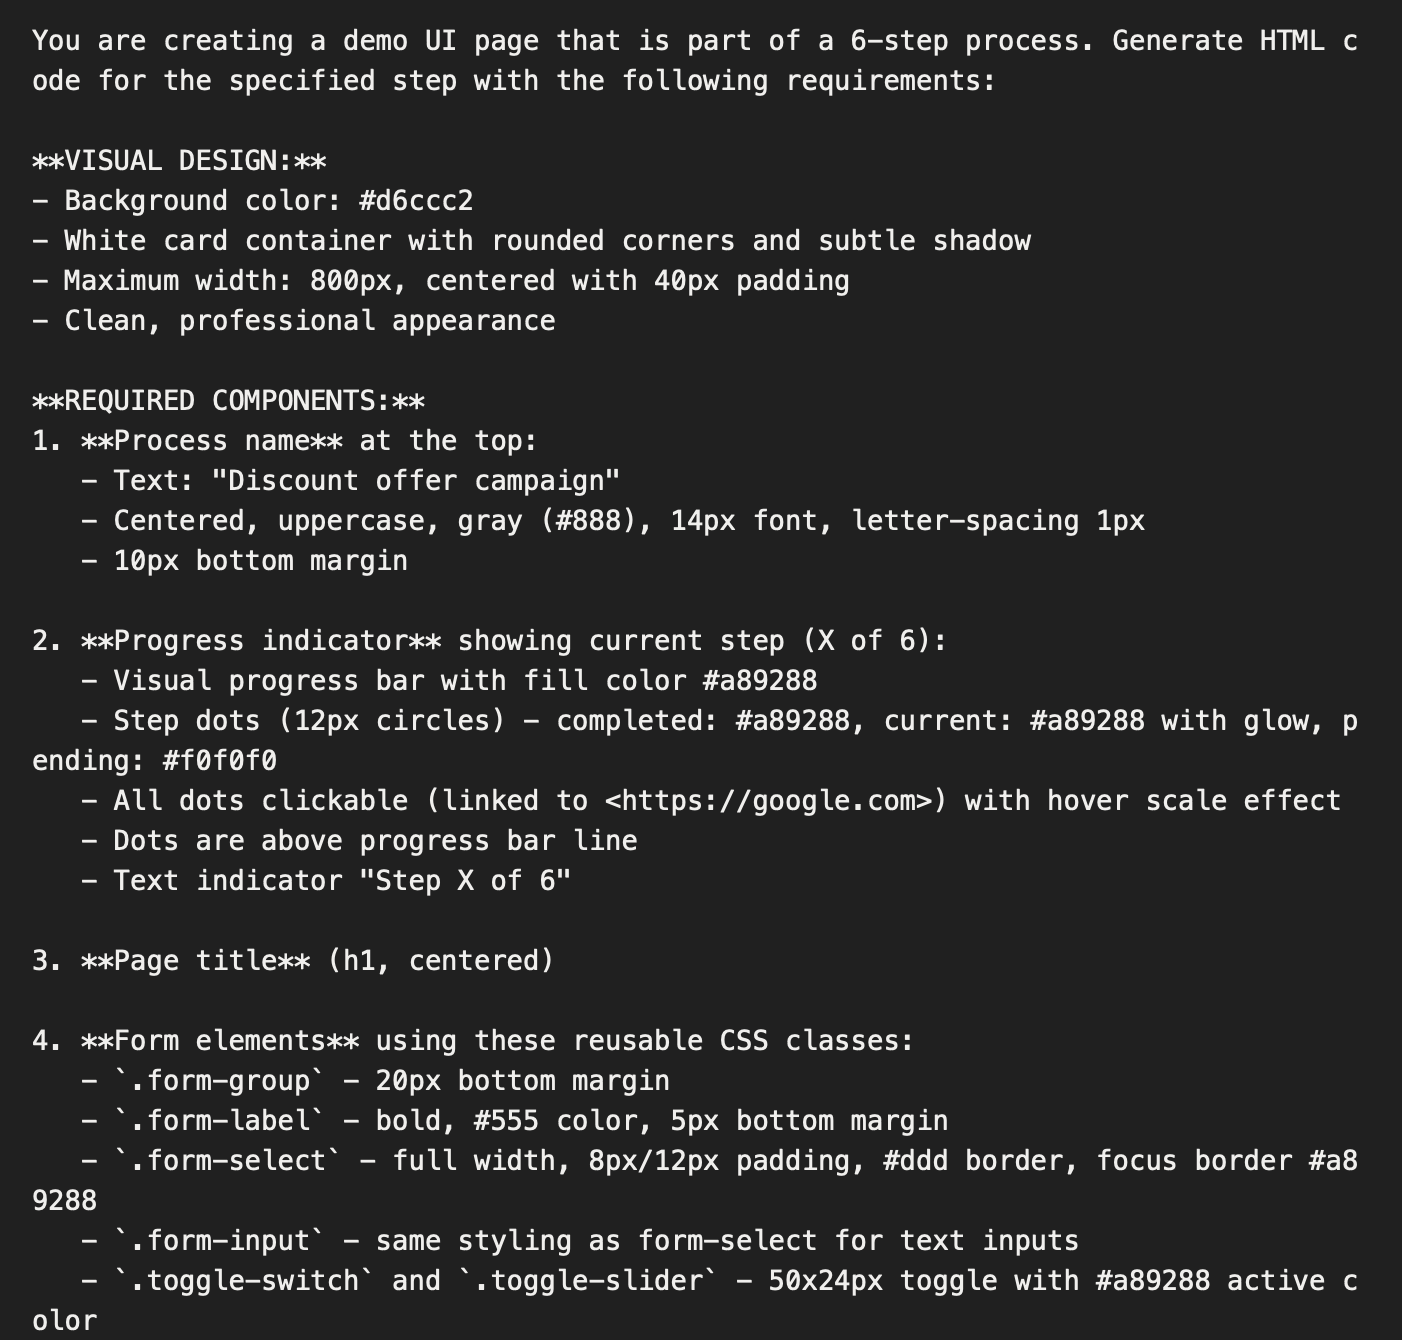
The next step was to describe the structure of the page. We started small, just to validate the approach: a whitelisting page with a simple toggle to enable or disable a function, and a dropdown with whitelist categories.
We also clarified that this was one of 6 pages in the broader process, helping the model understand the flow of the overall UI. Here’s what our initial prompt looked like:
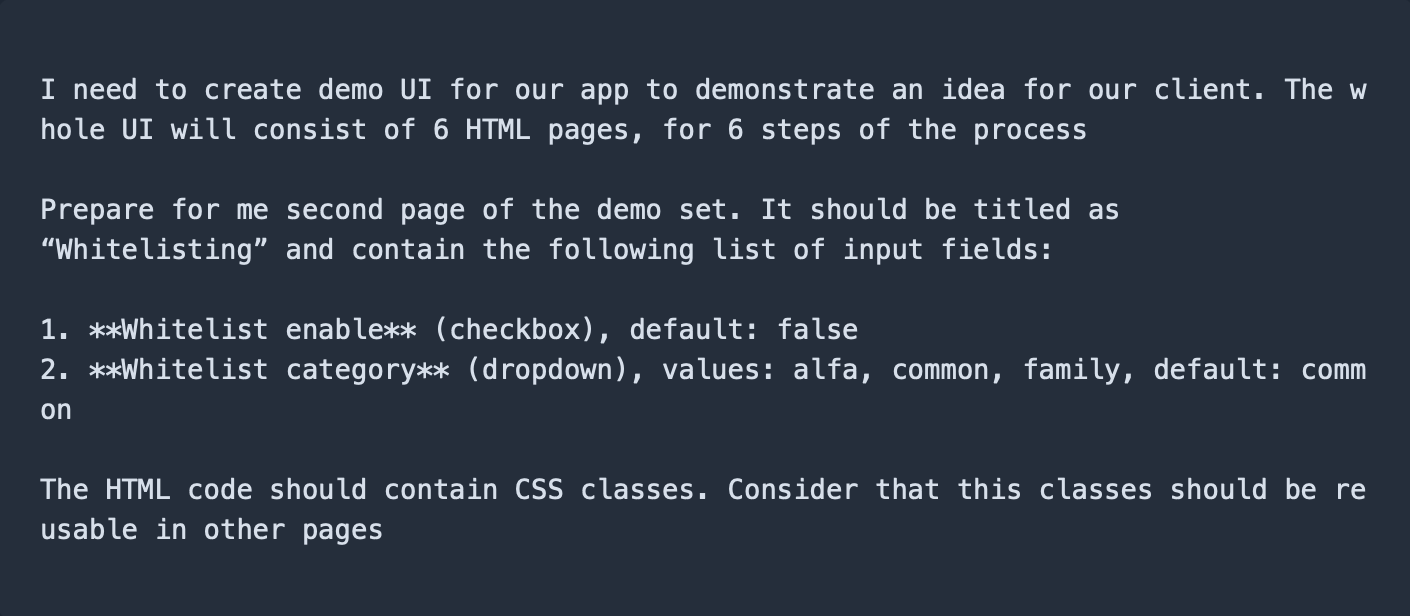
The first version of the page we received looked like this:
It was pretty basic and straightforward, that's right. But it already served as an interactive visualization of our concept. We enchanted it through a few follow-up messages that added more details and refinements to the LLM context.
Next, we asked the LLM to suggest possible improvements for the page. It recommended adding animations, a feedback form, keyboard navigation support, progress visualization, and help tooltips. We decided to skip the feedback form and keyboard navigation, but implemented the rest. The final version turned out noticeably more engaging and user-friendly.

Once we successfully generated the whitelisting page, we moved on to automating the process by asking the LLM to create a reusable prompt template.

The request included a list of key elements that must appear in the prompt, but avoided overly rigid constraints such as forbidding new design elements. Our goal was to preserve flexibility and allow creative options during generation.
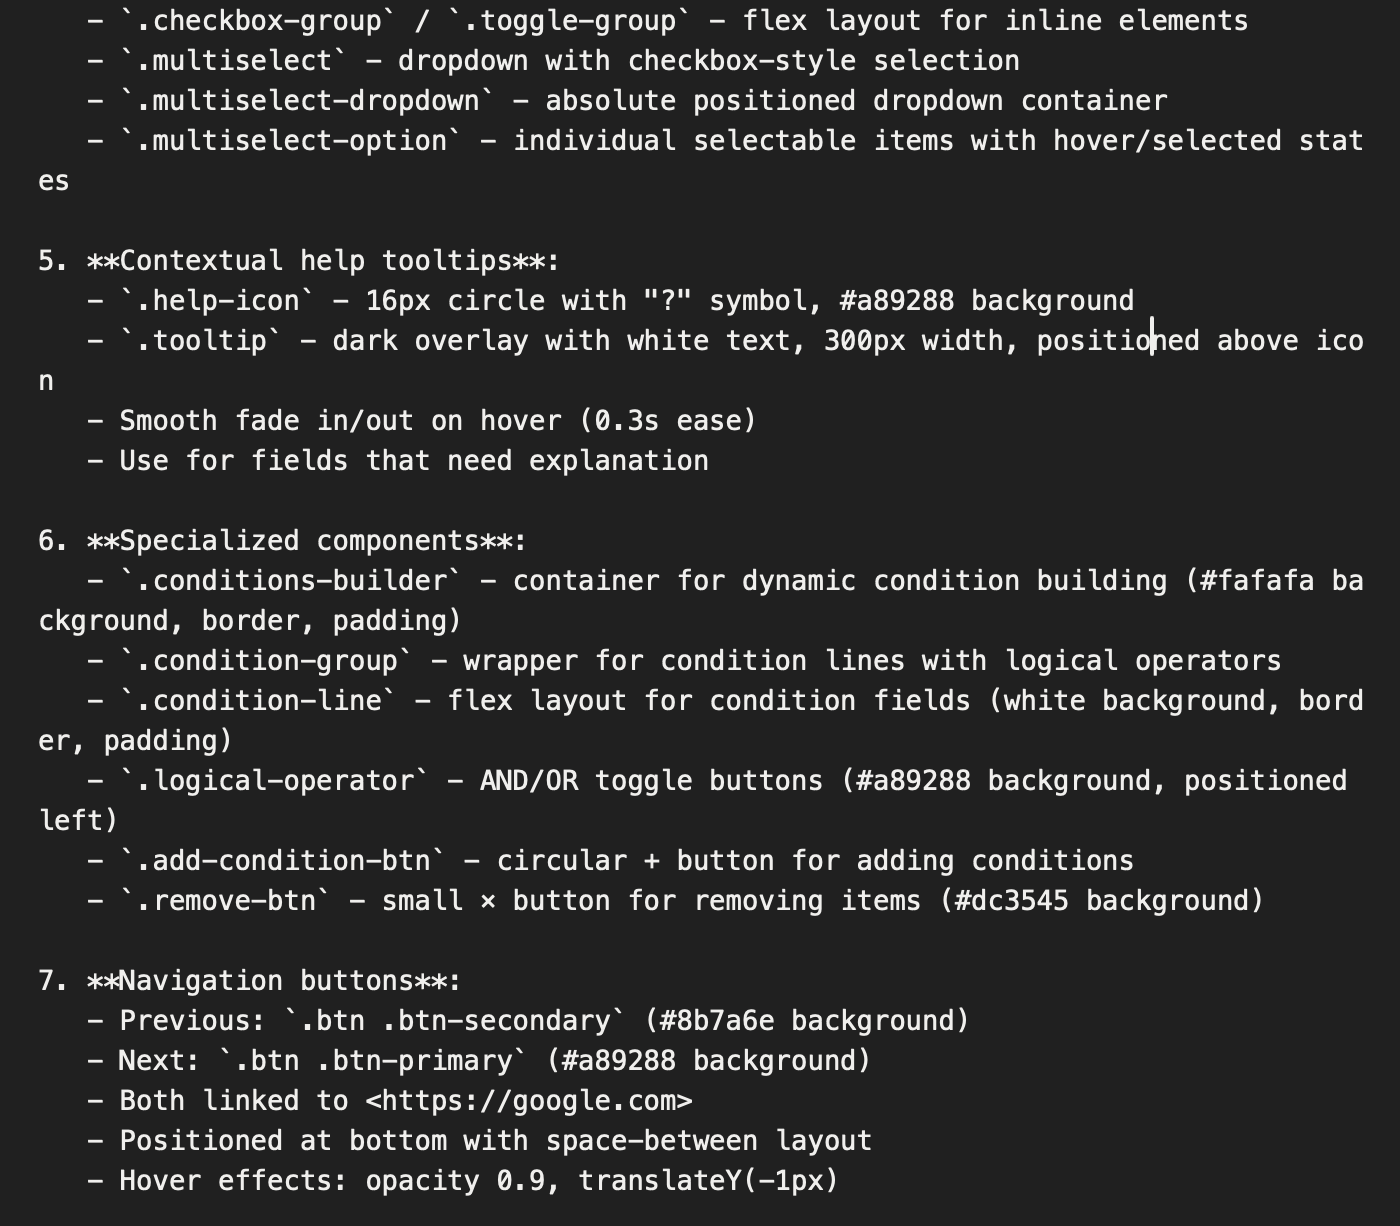
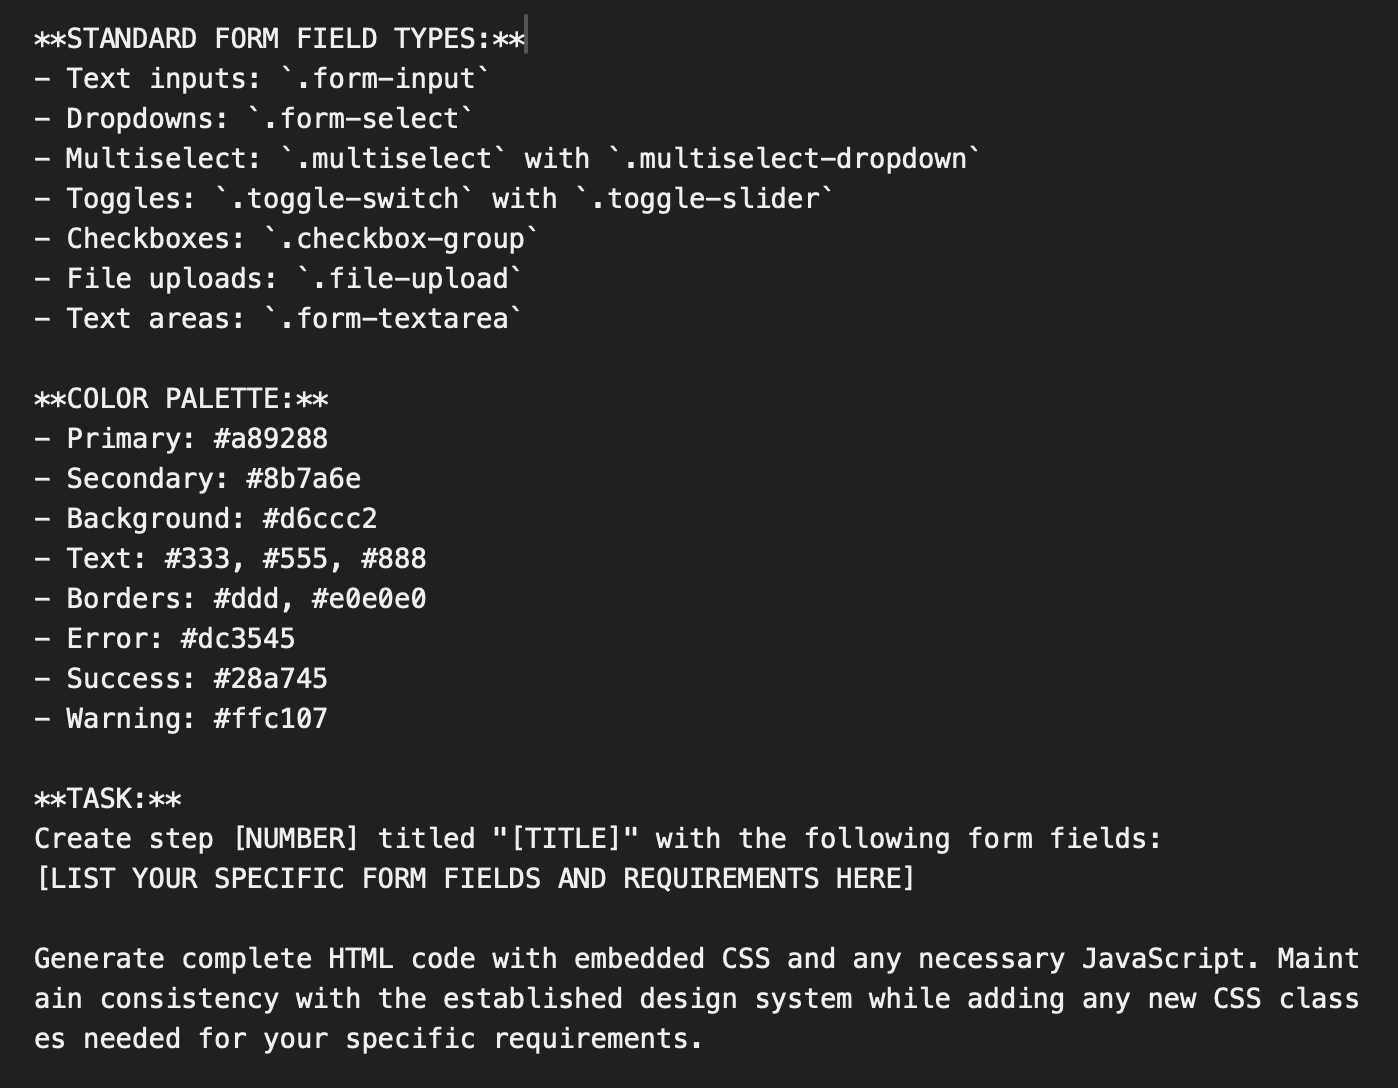
The LLM produced a detailed prompt that covered all essential design points and logic rules, without referencing specific CCS classes.


The “task” section of the prompt was structured so it could be easily updated for each new page. In your own use case, you can make a prompt as strict as needed, e.g., including a defined list of CSS classes or frameworks to apply.
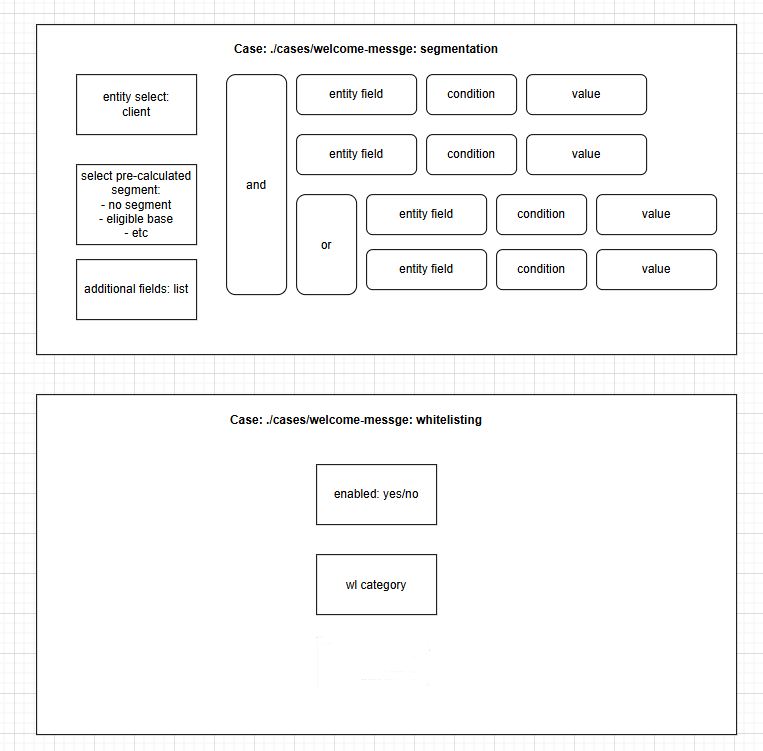
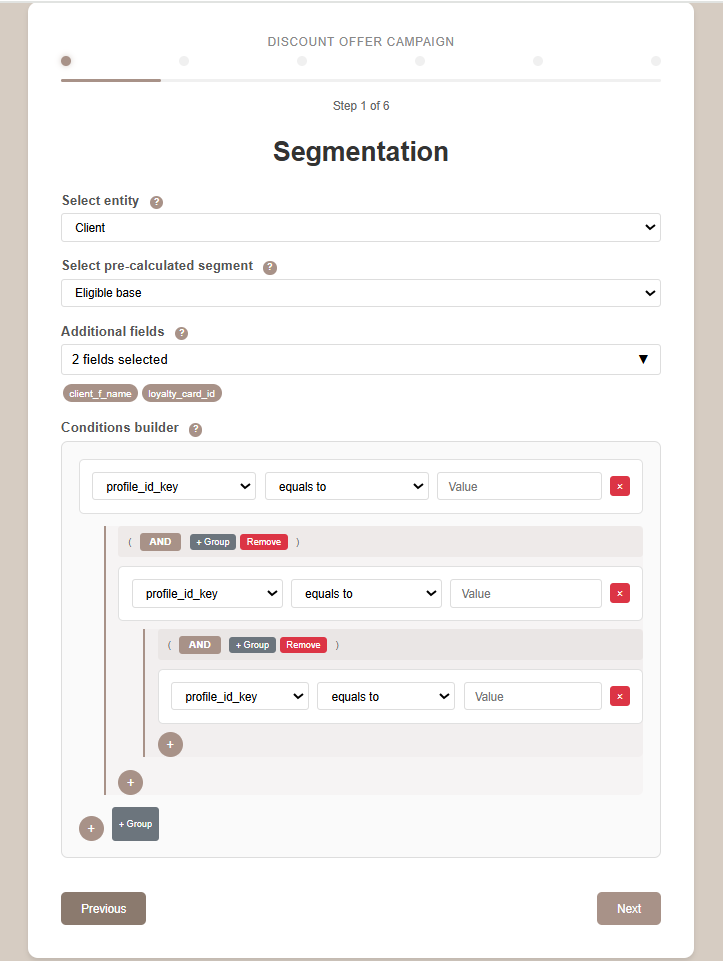
We applied a new prompt for the most complex page in the demo UI, the segmentation page. It featured multiple dropdowns and a condition builder for creating custom segmentation rules.
The first attempt didn’t fully meet our expectations because the condition builder couldn’t yet group conditions with mixed logical operators (AND/OR). We asked LLM for its idea on how to resolve this, then requested it to implement the proposed solution. After 2 quick iterations to fix minor code issues, we got the final version - clean, functional, and aligned with our concept. You can find the final page below.
We requested an updated prompt and received the following:

We then used the updated version of the prompt for all remaining pages, including four process pages, the main dashboard, and the ad-hoc messaging page.
The LLM-generated mockups were impressive but slightly inconsistent. Each page was created independently, leading to minor design and functional differences. To unify the UI, we made a few manual adjustments.
You can see an example of these refinements here:
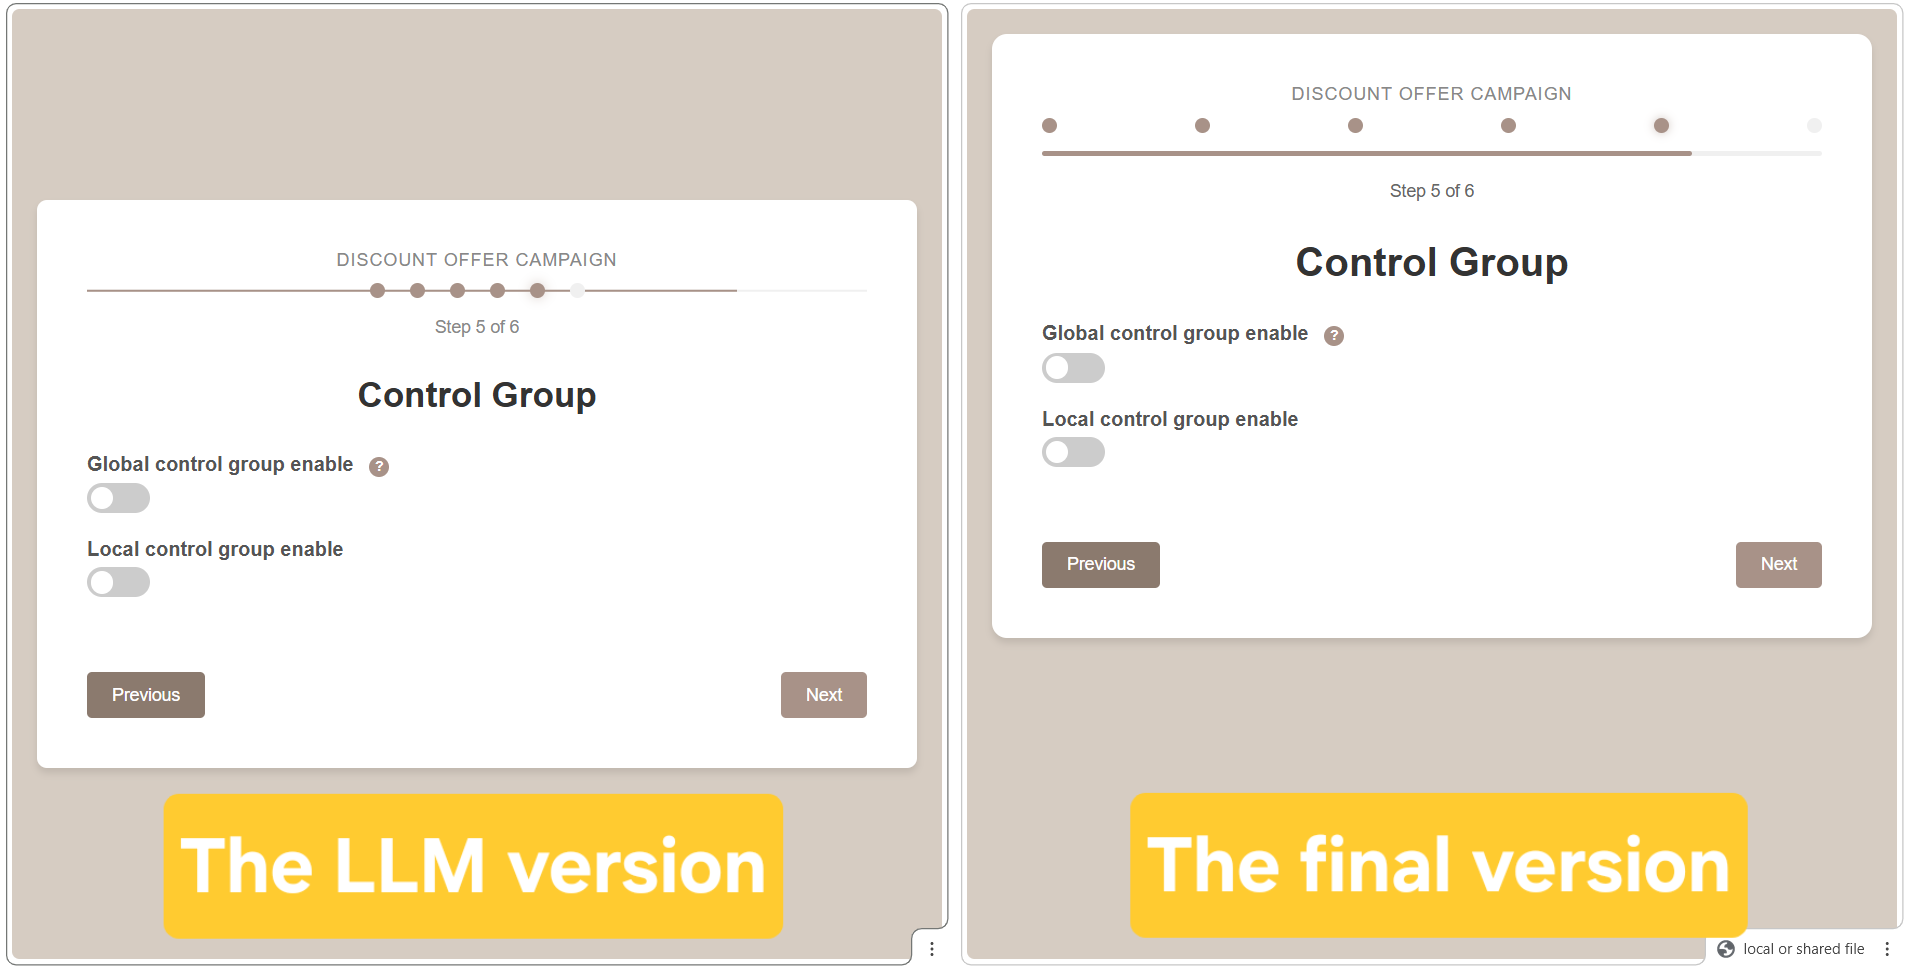
The outcome was an 8-page demo UI with a consistent design and smooth user experience built in just 8 working hours, including manual corrections. That’s roughly 5 times faster than a traditional design cycle.
Of course, the demo UI wasn't as polished as a designer's work, but it was more than enough to clearly communicate the concept and secure the client’s approval to move forward with interface development.
This approach can be adapted to other client validation scenarios. Whether you are generating UI mockups, diagrams, or presentation slides, the core logic remains the same:
It's a fast, practical way to visualize ideas, reduce feedback cycles and bring clarity to early-stage client discussions.